Top Quality Human Hair Manufacturer

Author: GOODYARD HAIR Page 26 of 37

Respect doesn't come from the kind of work you do, it comes from the way you do the work.

How to Apply Strip False Eyelashes

QQ截图20150912115111

False eyelash extensions, Strip Lashes, are a great way to add fullness and volume to your natural lashes quickly. Wear strip lashes for a day or for a few weeks. The choice is yours. Strip lashes are fast, easy, and you get consistent results every time.


1.Size the lashes. Before gluing the lashes on, you will need to make sure they are not too wide for your eye. Hold the lash strips up against your eyelid, and trim them down on the sides if necessary.

QQ截图20150912114815 

 If the strip needs to be cut to fit, snip the outer edge completely off with small nail scissors. This will avoid drooping at the corner (meaning: no more lashes poking your eyeball). 


2.Squeeze a thin line of lash glue onto the back of your non-dominant hand.

Now, gently run the outer seam of the eyelash strip along it. Allow the glue to dry for a moment before applying it to your lashes.

QQ截图20150912114853


3.Place the strip on your eyelid, positioning it as close as possible to your natural lashes. Bring the strip down from above, not from the front. This is to ensure that you get as close as possible to your lashline.

QQ截图20150912114909


4.Allow the glue to dry naturally. Once the strip is in place, you do not need to press or hold it.

QQ截图20150912114940


 5.Apply mascara to your lashes. This will help blend your natural lashes with the false ones, achieving a more natural look. You can use black, brown, or dark gray mascara.

QQ截图20150912114956

6. If you see a gap showing on the eyelid between your real lashes and falsies, don’t worry! You don’t have to pull it off and start again, says Brascia. Just fill in the gap, using a matte black eye shadow as a liner to hide it.This step will also help the glue dry more quickly. 

QQ截图20150912115020


HOW TO MAKE YOUR CURLS HOLD

#1. START WITH DAY-OLD HAIR

Your hair’s natural oils give your hair texture and make your strands more moldable. So if you plan on curling your hair, don’t wash it for a day or two.

#2. PROTECT YOUR LOCKS

Before you bust out the curling iron, make sure to apply a heat protector to your hair so you don’t damage it.spray your hair with hairspray before you curl, let it sit for a second to dry (so it doesn’t sizzle), and then curl it.

#3. USE THE RIGHT TOOLS.

Having the right tools makes all the difference. To begin, make sure you’ve selected an iron with the right size barrel. For hair that doesn’t hold a curl well, I recommend a ?-inch barrel. The curls will be tight without looking ringlet-y, and will loosen as the day goes on. If your hair holds a curl better than mine does, choose a 1-inch iron for instant beachy waves. Also, if your hair always falls flat, consider investing in a professional grade curling iron.

#4. TRY THE POST -IRON PIN.

Once you release your hair from the iron, simply pin the curl to your head until it sets. Once your entire head is pinned, mist it with hairspray. Then, carefully unpin your curls and comb through them with your fingers.

#5. NEVER FORGET THE HAIR SPRAY.

Once all of your hair is curled,spray it one last time with hairspray and then blow dry it on low for a few seconds.

How to Style Your Synthetic Wig

Styling Tools:

Your fingertips and a spray bottle of cold water are essential styling tools. Use only brushes and combs that are designed for wigs. Regular hairbrushes can cause over stretching of the hair and damage to your wig.

Shake and Go:

Our synthetic wigs have “style memory”. This means that they retain their style even after they have been washed. For this reason, they require very little styling. To restore the original style, simply shake the wig. If the style is still looking a bit “tired,” you can spritz it lightly with a spray bottle of water and work the hair with your fingertips. A spritz of water will also remove any static electricity. Do not comb or brush the hair when wet.

Styling Variations:

Your wig was designed with a basic style but the variations you can achieve are limitless. To add height, gently lift with a wig comb. For additional volume, gently tease or back comb and then smooth the surface hair over the teasing. To achieve a “spikey” look or to define your hair style, our liquid moose is an essential styling tool. For curly or wavy hair styles, simply mousse, hand scrunch and pick the style into curls. For straight hair styles, simply mousse and work the hair with your fingertips. Your wig can be returned to its basic style by washing it and allowing it to air dry.

Cutting Your Wig:

Your wig comes with a basic style, but it can be cut and shaped by a professional hair stylist to customize the look. This is a great way to make the wig uniquely your own. Often, a little trim on the bangs and a little thinning here or there can make all the difference. Everyone has a different face shape, a different forehead length, and different style preferences. To achieve the most flattering look for your unique face shape, the wig should be cut while you are wearing it.

Restyling Your Wig:

To completely restyle your wig, we recommend taking your wig to a professional stylist or wig salon.

How to Choose Human Hair Wig to Highlight Your Style

Human hair wig is extremely versatile .You can curl and style them as your own hair and it has been the list of popularity and fashion. But they are available in various styles, colors and length ,so that choosing the proper wig for you is a difficult task. Because you will consider your facial appearance, skin tone as well as your budget . Today, we offer some useful tips to help you choose a perfect wig that can highlight your unique style.

The details before choosing

Since that you decided to purchase a wig from human hair, it is sure that you hope it is durable, easy manageable and convenient for daily use. Generally speaking, a human hair wig is a good choice . A human hair wig is also an investment that you will be able to keep for a long time as long as you take good care of it. If you are fond of your present hair style, make sure the wig has sufficient space inwards and resembles it. When you plan to create a new look, then you will consider a new one to highlight your style

QQ截图20150814113816

 Consider Hair length

It depend on your decision .You can choose the length as your own interest .
Shorter styles are usually easier to care for. Longer styles may need conditioning and other maintenance.

QQ截图20150814114002

Consider Sizes Wig comes in four sizes, measured in inches. Measuring your head will give you an idea of your size. There are three ways of measuring: around the head, front to back and ear to ear. The first  Measure just over the ears and below the crest of your skull in back. Front to back is as it sounds: follow from your hairline to the top of your neck. Lastly, measure from  one ear over the crown of your head to the other.

QQ截图20150814114021

Consider facial shapes
Different facial shapes look better with different hair styles. If you have an oval face then you can try various kind . If your head is longer, it is better to choose one  that balances the forehead with the chin. Long hair styles and center parted wigs don’t look very good on this type. If you have a more square face, choose a  wig  that minimizes the broad lines and angles of your face, with roundness at the temples and the jaw line, such as curly, shags, and mid-length.

QQ截图20150814114154

Consider hair color
Some people feel most comfortable selecting a shade that matches their natural hair color. To do so, we recommend looking at your hair and color samples together under natural light to determine which color most closely resembles your own. In addition , you certainly don’t have to choose a color identical to your own. Then you will consider your skin tone. Then you can also ask your stylist , they can help you determine which shade works best for you.

QQ截图20150814114214

When you wear a human hair wig ,it really look your own hair .Most Importantly ,it will make you feel confident and comfortable.

How to Dye Hair at home

Getting Ready :

  1. Wash your hair 24 to 48 hours before dying.
  2. Pick a color that you really like. I
  3. Protect your home and yourself from dye stains.
  4. Put a towel or color cape around your shoulders.
  5. Brush your hair well.
  6. Coat your hairline, ears and neck before applying dye to your hair.
  7. Put on your gloves.
  8. Use the supplied bottle or a bowl to mix the dye.
  9. Mix your dye with developer.

Dying your hair:

QQ截图20150808101914

1

Use a comb to separate your hair into four different sections. Use large salon clips (found at your local drugstore) to hold the sections apart. Separating your hair into these sections will ensure that you don’t miss a patch of hair

QQ截图20150808102028

2

Apply the dye to your hair in sections. Break each section of hair up into smaller 1/4″-1/2” subsections as you work (this will just make your dye job more even.) Use the applicator bottle or brush to dispense the dye onto your hair. Use your gloved fingers to work the dye into your hair. Whether to begin applying the dye will depend on whether or not you have ever dyed your hair before.

For virgin (first time dyeing) hair, start applying dye about 1 inch from your roots.

For touch-ups, start applying dye about ½ inch from your roots.

Work the dye into your hair well so that you do more than simply color the top layer of your hair.

QQ截图20150808102154

3

Set a timer for how long you need to leave the dye in your hair. Follow the instructions on the box. Do not rinse the dye out before the minimum time or leave the dye in past the maximum time. Make sure to follow the directions exactly. If you have a lot of grey hair, it’s best to leave the dye in for the maximum amount of time. [8]

Never leave hair dye in overnight. Leaving it in overnight will dry out your hair and it may cause severe skin irritation as well.

QQ截图20150808102243

Rinsing Your Hair

  1. Wipe excess dye off of your neck and forehead with a paper towel or wet cloth.
  2. Wait until the process time is up to rinse your hair.
  3. Shampoo and condition your hair.
  4. Dry your hair and style as usual.

13 Thick hairstyles anyone can do

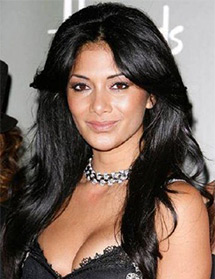
If you have thick hair, chances are you’re often torn between accepting the many compliments it receives, and explaining to the more sparsely tressed just how real your daily styling struggle is. However, there are a lot of hairstyles you can use to tame your mane and show off the naturally full-bodied finish. Check out some of our favorites below!

1. Vintage inspired curls

With the top smoothed down, a vintage-inspired curly hairstyle keeps thick locks under control while giving them plenty of room to move and expand through the lengths. Plus, it’s probably themost classic red carpet hairstyle of all time, so you can channel your inner A-lister with this look!

QQ截图20150808093244

Styling tip

Part your hair while it’s damp, then use your blow dryer to set it into place in the direction you want it to fall. Just don’t forget to apply a smoothing heat protectant like Advanced Hairstyle SLEEK IT Frizz Vanisher Cream first!

2. Chunky French braid

A chunky braid is the perfect way to handle high volume hair when humidity is a major issue. When you already have a lot of hair, there isn’t really a lot of room left for frizz… unless you’re totally cool with your hair taking over your entire face. So, why not use the added body to your advantage with an XXL braid? It keeps your tresses under control without totally squashing the texture, and it only takes a few minutes to do!

2

Styling tip

Start the French braid halfway down the back of your head, and keep it as tight as you need to while braiding. You can loosen it when you’re done by gently pulling it apart at the sides.

3. Zoe Saldana’s half-up waves

Thick hair lends itself perfectly to anything that’s supposed to look voluminous, like the very subtle bouffant at the crown of Zoe Saldana‘s half-up wavy hairstyle. Although it may require a little backcombing, it won’t take long to build enough height.

3

Styling tip

When securing the half-up twists at the back, gently bump the hair forward to boost the final shape of the bouffant.


4. Topknot

The classic topknot is one of those “if it ain’t broke, don’t fix it” hairstyles, especially for really thick or generally unruly tresses. It’s quick, easy, and it’ll last all day long. Topknots are also unbeatable when it comes to frizz prevention during humid spells, too!

4

Styling tip

For added detail, tie your hair into a high ponytail, then braid the pony before securing it into a tight knot.

5. Loose bouffant


Sixties inspired bouffant hairstyles are perfect for naturally thick hair and this loose hairstyle is a quick and easy way get a full-bodied mane under control. Depending on your texture, you may have to flat iron your locks first, but otherwise, simply backcomb the hair at the crown, sweep everything back off your face, and secure at the back with bobby pins.

5

Styling tip

Apply a volume enhancing product like Advanced Hairstyle BOOST IT High Lift Creation Spraybefore backcombing to build height that lasts.

6. Karlie Kloss’s tousled beach waves

Beachy waves often look better with tons of volume, as proven by model Karlie Kloss. The texture combined with a full-bodied finish create a sultry, face framing hairstyle that’s perfect for a glam night out, or even a more pared down, casual look.

6

Styling tip

Use a texturizing heat protectant like Advanced Hairstyle TXT IT Tousle Waves Spray and a 1″curling iron to create loose waves. For the most natural looking result, make sure you alternate the direction your curl each piece of hair in.

7. Big bun

A big messy bun is just as practical as a topknot for thick hair, but it has a more elegant, fashion forward finish. You can even rock it with slightly damp hair and call it ‘wet look’! Just don’t forget to apply a smoothing cream first to keep flyaways at bay while the hair dries.

7

Styling tip

To make creating the bun as easy as possible, secure your hair into a mid-height ponytail first, taking care not to pull it too tightly, then twist and pin your hair into a messy approximation of a donut. It doesn’t have to be perfect, in fact, the more disheveled the end result is, the better!

8. Retro headscarf hairstyle

Whether you go for a bun, a pony or a loose wavy ‘do, a retro fifties headband look is the perfect way to keep thick hair under control without compromising on style. You can choose a headbandthat coordinates with your outfit to really tie your whole look together, or keep the contrast to make your hairstyle pop.

8

Styling tip

To make sure your headscarf stays in place, secure it with some clandestine bobby pins behind each ear. Spritz the bobby pins with dry shampoo before using them to add more grip, too.


9. French braid for short hair

If you have a thick bob hairstyle that tends to misbehave in humid conditions, try a cute French braid hairstyle. This pretty short hairdo can be done on every hair texture, and you can pin any major pieces into place should they fall out while you’re braiding it. Keep your friends close and your hair pins closer…

9

Styling tip

Spritz the roots and the lengths of your hair with dry shampoo before you start braiding to give your hair extra grip and a clean looking finish. Leave it on for five to ten minutes before brushing it out for the best results.

10. Rockabilly ponytail

While we have nothing against a regular ponytail, it’s feels good to switch things up every now and then. We love rockabilly ponytails because they have all the practicality of your go-to workout ‘do, with more vintage flair than you can shake a curling iron at!

10

Styling tip

To create the pomp in front, section off the hair with a tail comb, then use it to gently backcomb the hair from behind. Insert the comb, push the hair back on itself, then take the comb out and repeat. This will help you to avoid unnecessary breakage that happens when you rip through the hair in a fast, up and down motion.

11. Messy updo

With the hair piled on top of the head, this messy, curly updo is the perfect way to tame thick tresses while keeping any texture you have center stage. All you need to do is twist and pin your hair up in individual sections until it’s all up, taking care to leave the ends loose.

11

Styling tip

For added movement, curl the lengths and ends of the hair before putting it up. Just don’t forget toapply a heat protectant first!

12. Beehive updo

Have you always had a thing for Audrey Hepburn’s beauty look in Breakfast at Tiffany’s? Would you jump at the chance to go back in time to the sixties? If you answered yes to either of those questions, you should add this beehive updo to your must-try hairstyle list!

12

Styling tip

For a voluminous hairstyle that won’t fall flat, make sure you mist your finished ‘do generously with a brushable hairspray like Advanced Hairstyle LOCK IT Bold Control Hairspray. Not only will it give your beehive great hold, it will also create a protective barrier between your hair and any moisture that may be lurking in the air, ready to wreak frizzy havoc on your beautifully coiffed masterpiece!

13. Thick low ponytail

low ponytail is always a great idea when you need your hair to look chic and under control, and you only have a few minutes to make it happen! With thick hair, you don’t need to worry about creating extra height or volume, and you can polish up the look by camouflaging the hair tie with a small piece of the pony. Simply take a pinch of hair from underneath, wind it tightly around the pony and secure underneath with a pin.

13

Styling tip

Add shine to your completed ‘do with a glossy finishing spray like Advanced Hairstyle SLEEK IT Strand Smoother Serum Spray.

How to Prevent Your Hair from Tangling

Tangled hair is never fun. In fact, it’s quite painful when you can’t get them out, right? So, I thought I’d share some easy tips to help you avoid those pesky tangled hairs!

  1. Condition your hair

   Conditioning the hair will restore moisture back into it, leaving it smoother and less likely to tangle. If you need something more powerful than a rinse-out conditioner, try a leave-in treatment each day or do a deep conditioning treatment every one to two weeks. If you have oily hair and worry about making it worse, just remember to only condition the ends of your hair not the scalp!

QQ截图20150727090028

  1. Use a wide tooth comb

   Although it may be tempting to use a brush because it’s ‘faster’, using a wide tooth comb (or a special detangling brush) is a much better idea, trust me! Not only will it remove the tangles more efficiently, but you will also protect your hair from being torn and damaged. Start at the bottom of the knot, and *keyword: patiently* work your way up until it is combed out completely.

QQ截图20150727090046

  1. Brush your hair consistently

If your hair is prone to tangling, it’s probably not a good idea to let it down all day (especially in the wind) without brushing it. Brush your hair 2-3 times a day using a soft bristle brush, especially before a shower and before sleeping. Be gentle while brushing, ladies! 

QQ截图20150727090108

  1. Protect your hair while you sleep

  Comb all tangles from your hair at night before going to bed and braid or wrap your hair and pin it out of the way. Cover your hair with a silk scarf and use a satin pillowcase. This will prevent your hair from becoming tangled or snarled while you sleep. Above all else, however, don’t go to sleep with soaking wet, uncombed hair!

QQ截图20150727090120

Helpful Detangling Tips 


  • Split your hair in manageable sections: tackling a knot can definitely be frustrating! We recommend to work on detangling your hair one section at a time. 
  • Never brush wet hair: wet hair is much more likely to break than dry hair.
  • Use your fingers: to gently detangle your hair periodically throughout the day 
  • Tie your hair: in a braid or a ponytail on windy days or when being active


If you have any other ideas to prevent hair tangle, Please share with us by commenting below~

5 Beachy summer hairstyles for men(Excerpts)

If you’re the kind of guy who doesn’t like to wear his hair perfectly coiffed all the time, beachy summer styles are probably right up your street. Whatever your hair length, there are plenty of disheveled, tousled hairstyles to try from long waves to short, messy ‘dos.

Below, we’ve handpicked five of our favourite beachy looks for men. Which one will you try first?                                                  

1. Tousled side sweep

This simple yet completely pulled together hairstyle is “done” enough for work without being perfectly polished. The texture has a really laid back, summery feel to it, and if you style this look with a flexible hold product like Advanced Hairstyle TXT IT Hyper Fix Putty, you can wear it smooth for the office, then ruffle it on your way to happy hour.

QQ截图20150711103133


2. Long sideswept surfer hair

  For anyone wishing to channel their inner surfer, even if the nearest large body of water is the local swimming pool, a long sideswept hairstyle is definitely worth considering. It’s the quintessential beachy look, and it works with straight, wavy or curly hair. All you need is a small amount of product like Advanced Hairstyle TXT IT Deconstructing Gum to add texture and keep it there throughout the day.

QQ截图20150711103204

3. Brushed forward waves

If you have naturally curly hair, showcase the natural texture with a brushed forward hairstyle. Use some gel to define the curls then rake them into place with your fingers before it sets to complete the look.

QQ截图20150711103237


4. Long shoulder-grazing waves

Long hairstyles for men are a huge grooming trend this summer, and if you really want to go for it, a shoulder-length wavy style is a great way to do so. This hairstyle is long enough to pull back into a knot, but it also looks great au naturel, especially with a few messy waves thrown in for good measure.

 QQ截图20150711103254


5. Messy voluminous waves

While rockabilly hairstyles are traditionally quite polished, this more modern take on the look has a really laid back vibe thanks to the tousled texture. With plenty of height on top, this style definitely isn’t uptight, but it isn’t too messy either.QQ截图20150711103310


5 Braided wedding hairstyles for summer brides(Excerpts)


Choosing the right hairstyle for your wedding day is a huge deal, not to mention a seriously difficult decision. Among your many options, there are plenty of bridal braids to explore- well, why not make the most of someone else doing your hair, right?

We’ve handpicked five of our favorite braids below. Who knows, maybe you’ll find “the one” among them…                                             


  1. Braided crown

It’s your special day and you should feel like a princess, or a queen, or some kind of goddess! To that end, a crown is essential, and forging one from your own hair is probably a more realistic and less time consuming option than hand crafting one from real gold.

QQ截图20150707172453

Styling tip

Keep the braid tight while you’re working on it, then loosen it afterwards. To add texture, use an old toothbrush after misting the bristles with hairspray.

2. Triple French braided updo

If you want an intricate hairstyle that looks beautiful, but is guaranteed to keep your hair out of your face, try a triple French braided updo. It’s time consuming to say the least, but the beautiful results are totally worth it. Again, you have to make the most of being pampered!

QQ截图20150707172515

Styling tip

If you’re really good at braiding your own tresses and want to road test this updo yourself, do so with dirty hair. Apply a dry shampoo like Advanced Hairstyle BLOW DRY IT Longwear Spray first, then brush it out to eliminate excess oil and add grip through the lengths.

3. Braided bun

Braided buns are an exciting option because there are so many ways to wear them! There’s the placement, the texture and the braid technique to consider, but whatever you choose, the finished updo will be elegant, understated and downright gorgeous.

QQ截图20150707172526

Styling tip

After misting your bun with hairspray, mist your hands with water and smooth down the sides. This will create a sleek, flyaway-proof finish.


4. Reverse braided crown

Quite literally flipping a braided crown on its head, this hairstyle keeps the braids at the back. It’s just as pretty as a regular braided crown, and there’s plenty of room for accessories, or a veil!

QQ截图20150707172541

Styling tip

Try this hairstyle with a soft, romantic finish when trialling different hairstyles ahead of your big day. All you need to do is apply a texturizing heat protectant like Advanced Hairstyle TXT IT Tousle Waves Spray and rough dry your hair to create an undone, natural look to work with.

5. Braided, jeweled chignon


With a small braid, a sophisticated bun and all the room you could possibly need for bridal hair accessories, this chignon pretty much has it all. If you’re not so good at choosing just one thing to focus on, it could be the perfect wedding hairstyle for you!

QQ截图20150707172559

Styling tip

Add shine and keep your hair free of frizz with a high-shine finishing spray like Advanced Hairstyle SLEEK IT Strand Smoother Serum Spray.


Mink eyelashes: Are They Worth The Fuss?


QQ截图20150707164625

Mink fur eyelashes are available now exclusively at Good Yard Hair!The same glamorous lashes once available only to celebrities such as Jennifer Lopez, Madonna and Lindsay Lohan are now available to you.

Mink Eyelashes are 100% natural mink- not synthetic imposters.

They are made from individually selected mink fur hairs that have been harvested by gently brushing live animals.

Our mink lashes are hand-made. Because they are not chemically treated or dyed,the rich, velvet-like appearance found only in mink fur is successfully maintained.


 WHY MINK FUR EYELASHES ARE BETTER?

QQ截图20150707164649

Celebrities choose mink eyelashes for a reason! Mink hair provides more length and thickness, and with less weight than human hair, with every strand . Mink hair also will withstand more uses than synthetic eyelashes, with mink eyelashes reported to last up to 25 uses from a single set.

At the same time, mink eyelashes are also fine and lightweight enough to include multiple strands (hairs) per lash, which is why The Lashes strip lashes can be quite thick and dense without overloading the eye.

Looking for a dramatic lash or a subtle one?

         We made a handy dandy chart just for you.

SUBTLE:

QQ截图20150707165002

M-1

Criss-crosses give a natural glam effect. Some types of eyes, like smaller eyes or shallow-lidded ones,can’t carry several sets of lashes.If you want to add drama and extreme dimension without extra weight , this one will be your best.

 QQ截图20150707165017

M-2

When you want sexy that does not necessarily look natural,this lash is for you.

Little Criss-crosses reduce the weight,extremely thick give you a fuller looking.

 QQ截图20150707165031

M-3

Wisps give a glam look,making it look like you were born with flawless lashes.

QQ截图20150707165042

M-4

With a length that fans out most the outer corners,these lashes add length,volume,and help the eyes pop.I would say they also look surprisingly natural.

 QQ截图20150707165053

M-5

Spikes,gives a retro, wide-eyed cutie look.Kinda like Twiggy,it work equally well for period-inspired makeup(especially a 70’s look)as they do when layered with individuals for a modern red carpet look.

 QQ截图20150707165104

M-6

Ultra thick,whimsical,and very feminine.These lashes add the maximal amount of length and volume to help the eyes pop.They are dramatic and make a bold statement.

 QQ截图20150707165118

M-7

Thick and feminine.This particular style adds dramatic length and volume,and helps the eyes pop.

QQ截图20150707165128

M-8

These add a tremendous amount of volume,a moderate amount of length,and add a lot of glamorous, dramatic,and feminine.


HOW TO CARE THE MINK EYELASHES?

Mink fur eyelashes should be treated with care.Just an you would not bathe or sleep in a mink coat.The mink eyelashes should not come into contact with water and should be removed and stored safely before gonging to sleep.

Don’t settle for beautiful.Be charming,be you!

QQ截图20150707165754


How to Cut a Lace Wig

Creating a lace front wig is a long, meticulous process that can take several hours to several days. Once the wig is complete, the excess lace that hangs over the forehead must be trimmed back into the wig for the most natural look. This is a delicate process that takes a steady hand, a good pair of scissors and a lot of patience. Since a lace front wig does not reach all the way around to the nape of the neck, this process will be shorter and a little easier than a full wig.
1. Find the center of the front of the lace wig and slide the thin hair clip vertically to mark the position. There should be two even lace pieces on each side of the clip.
20150529182614
2. Clip the hair on either side of the center-marking clip back using the two large hair clips. This will keep any stray hairs from being cut.
20150529182652
3. Cut away about a quarter-inch of the lace all around the front and sides of the wig. Do this using long, fluid scissor strokes to avoid jagged edges. It is best to cut away small portions of lace instead of all of it at once, since cutting away too much lace will ruin the wig.
20150529182740
4. Remove the center-marking clip. Keep the hair clipped back, adjusting the clips as necessary.
5. Cut the lace back towards the beginning of the hairline in the front. The lace that is on the forehead will be the most visible, so it should be cut back all the way to the hairline. Pull the lace tight with your fingers while cutting to ensure even, smooth strokes.
6. Trim the sides of the lace front wig so that only about an eighth-inch of lace protrudes out from under the hairline. It is not necessary to cut the lace all the way back on the sides, since this part is not as visible as the forehead area.
20150529182943

Amazing Homecoming Hair Tutorial

Do you love this homecoming hairstyle? Now I’ll show you how to get it.

Materials:

1. 18″ White Blonde Clip In Indian Remy Human Extensions

E71604 (2)1

2. Flower Crown

3. Several Bobby pins

How to Create this classic boho pretty hair style?

Step 1: Install the hair extension to add more hair volume to this look. Then brush out all the hair and blend the extension into hair

Step2:Take one side of your hair and split this into three equal parts.

Step 3: Braid it all the way down like a normal braid. Braid the way straight out. Try braid outwards rather than downwards.

Step 4: Loose the braid a little bit messy and a little bigger and smooth it on the top of the hair.

Step 5: Grab the braid up around the head. and look in the mirror and adjust how you like it and then take the ends and bobby pin them down.

Step 6: Do the other side of your hair. So that it is even on both sides.Grab this around your head and make sure it cover other side over the bobby pins and you are going to take its ends and bobby pin them down underneath the first braid.

Step 7:Secure both braid by a lot of bobby pins and pin down any place that you think doesn’t stick out too much.

Step8: Pull out some pieces of hair on the side. You can dowhatever you want for these pieces. You can pull out or you can pin them back. Choose it according to your liking.It is the personally preferences.

Step 9: Add the flower crown and bobby pin the flower into your hair. So this really pretty boho unique look is done. It is so fun and beautiful. As long as you bobby pin it well, this look stays all the day along.

Why do people have different hair colors?

human hair

We always see people with different hair colors from either on TV or in the poster, or even in person. They have their hair in black, brown, blond, red, yellow, grey, white, green, pink, blue, etc. Have you ever wondered why people have so many different hair colors?

2

Like the case of different colors in human skin and eye colors, human body produces two pigments: emplaning in dark brown and black hair which is also known as melanin, and pheomelanins in red and blonde hair. As the color depth is determined by the amount of melanin, therefore, human beings will have different hair colors ranging from dark black (when there is lots of melanin) to light blonde (when there is less melanin and more pheomelanins).

According to the research data, the most commonly seen hair color among the human beings around the world is black, with brown (also called “brunettes”) next to it, due to the reasons factors of different regions, climates, dietary habits and geological conditions.


Blond hair may range from nearly white to a dark blond. The mixture of blond and red hair is called “strawberry blond”. And as you have certainly noticed, there are also redheaded people. Their hair color ranges from fair red to auburn and dark burgundy and is the rarest hair color of all

.blond1

4What about grey or white colored hair? This kind of hair color is mainly appeared among aging people, whose body has probably stopped producing melanin so that their hair can only appear light pigments by presenting the grey or white colors. However, for some people white hair can appear as early as in their childhood, which may be caused by gene or lacking calcium. Though it’s one of the most fashionable colors now as we all know.

As for other are extremely hair colors such as green or purple, don’t be curious, because they are not a person’s natural hair

color and they have artificially been colored or dyed with different colorants. Others are wearing colored hair extensions to protect their natural hair.

Ombre & Rainbow Color Hair Trend In This Spring and Summer

The Ombre & Rainbow color hair trend has been spotted on dozens of ladies, even those celebrities. Darker roots and lighter ends are the most amazing features.Colorful hair just as the amazing rainbow is loved by most of young ladies. More and more girls fall in love with this hair color trend and now it’s gone global. Now I’d like to share ombre & rainbow hair color for you here. Are you considering sharing your ombre or rainbow hair color in this spring and summer?

Ombre color hair

ombrehair2 ombrehair3 ombrehair4 ombrehair5 rainbowhair3 rainbowhair4Colorful Rainbow hair

ombrehair1rainbowhair6 rainbowhair5 rainbowhair1 rainbowhair2

Granny Hair Trend: Are You Ready?

Granny hair are all over the Internet and our life these days. But it had something of a turbulent journey before. It was a color represents oldness which was desperately dyed by older for a long time, in most people’s mind, and for many, this mentality remains.

The first time, gray silver color came to the sight of the world’s high fashion at Jean Paul Gaultier’s 2011 Autumn Winter debut. Then the celebs started taking notice. Gray was selected by Nicole Richie, Kate Moss, Rihanna, Zosia Mamet and etc. The trend is now finally making its way to your clients.

Silver strands took over Instagram this month with the hashtag #grannyhair. It’s so popular especially with 18-25’s.  This trend on Instagram appears to have started with Kylie Jenner. It’s all over Instagram now.

Lady Gaga rocked a stunning silver platinum hair. Amazing!

It’s not the trend just for ladies. Lucky Blue Smith, the male model that we’ve got on the brain at New York Fashion Week (and Instagram feeds), also like gray hair.

Gray hair with a little bit purple & blue touch will make you appear more alive and sexy.

Ombre color is very popular these years. When gray meets ombre, it’s perfect!

Stunning with bob too! Miranda Priestly (Meryl Streep), demanding editor-in chief of a high fashion magazine at movie “The Devil Wears Prada” also has ombre gray color short bob hair. So cool and fashionable.

What do you think? Gray hair is trendding. Would you like to get on board now?

For huge inventory of grey color hair wigs with wholesale price, please don’t hesitate to email at gyh001@goodyardhair.com or leave a comment on our blog. You won’t be disappointed!

Page 26 of 37

Powered by WordPress & Theme by Anders Norén